Light Sensor with LED Progress Bar using ESP32

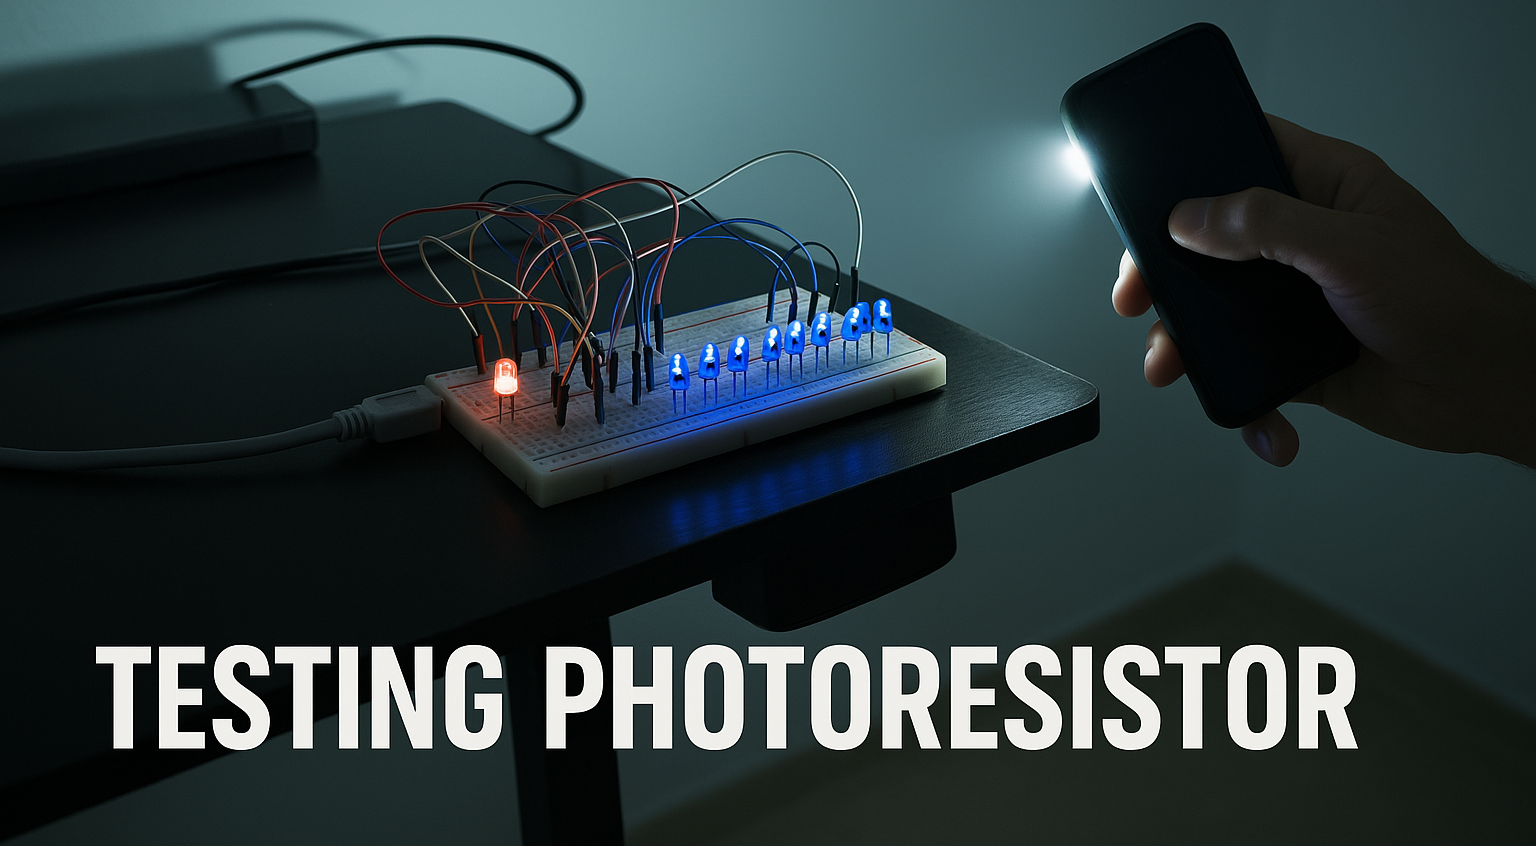
Light is everywhere, but how do we make it visible to a microcontroller like the ESP32? Enter the photoresistor, also known as an LDR (Light Dependent Resistor). This component changes its resistance based on the light it receives — high resistance in the dark and low resistance in bright conditions. It's a simple yet powerful way to sense ambient light in your environment.
In this post, we’ll explore a creative way to visualize light intensity using an ESP32 and a few LEDs. The project is perfect for beginners looking to get familiar with analog input, sensor data, and controlling digital outputs like LEDs.
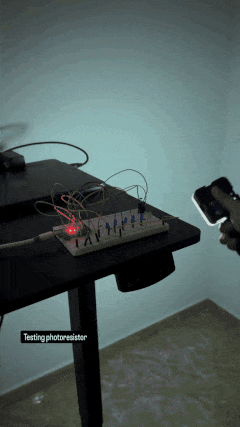
As ambient light increases, LEDs light up one by one until the bar is fully lit — a satisfying and interactive way to learn electronics! 😎
🔧 Hardware Required
- 1x ESP32
- 1x Photoresistor (LDR)
- 6x LEDs (5 blue, 1 red)
- 6x 220Ω resistors
- Jumpers
- Breadboard
⚙️ Wiring Instructions
| Component | ESP32 Pin |
|---|---|
| Photoresistor | GPIO 34 |
| LED Blue 1 | GPIO 18 |
| LED Blue 2 | GPIO 19 |
| LED Blue 3 | GPIO 21 |
| LED Blue 4 | GPIO 22 |
| LED Blue 5 | GPIO 25 |
| LED Red | GPIO 23 |
⚠️ The other leg of the photoresistor should be connected to 3.3 V. You may need a resistor to form a voltage divider for more accurate readings.
🧠 How It Works
The ESP32 reads analog light values from the photoresistor. These values range from 0 (very bright) to 4095 (very dark).
We map the light readings from a custom range — 3000 (dark) to 1500 (bright) — to determine how many LEDs to turn on.
This gives the effect of a progress bar that fills up with increasing light.
💻 Code Overview
The code sets all the LED pins as output and continuously reads the light level. It uses analogRead() to get light values and maps those values to determine how many LEDs should light up.
int ledsToShow = map(luz, 3000, 1500, 0, numLeds);
ledsToShow = constrain(ledsToShow, 0, numLeds);
If light increases, more LEDs turn on from left to right. If the light decreases, they turn off progressively.
Full code is available in the main.cpp file of the repository (or at the bottom of this post).
📸 Demo in Action
🎯 Use Cases
- Light meter for a classroom or office
- Visual signal for light-sensitive devices
- A fun interactive toy!
✨ Extra Tips
- You can customize the light range depending on your environment by adjusting the
map()values. - Change LED colors to create your own style.
- Try placing your hand over the photoresistor to simulate a sunset! 🌇
📘 Resources
Made with ❤️ by Omar Flórez — cv.omarflorez.me
Ready to light it up? 💡